Let’s say you find the perfect font on a site such as Google Fonts and you want to use it on your computer. Unfortunately, you aren’t sure how to install it so you move on and forget the idea entirely. Has this happened to you? Well I have good news. Those days are over. You are about to become a font installation guru!
Time involved: Less than a minute (after you’ve picked out the font you would like)
Difficulty: Very Easy
Usefulness: High
Website: Google Fonts – Open source fonts for any type of use
System: Windows PC
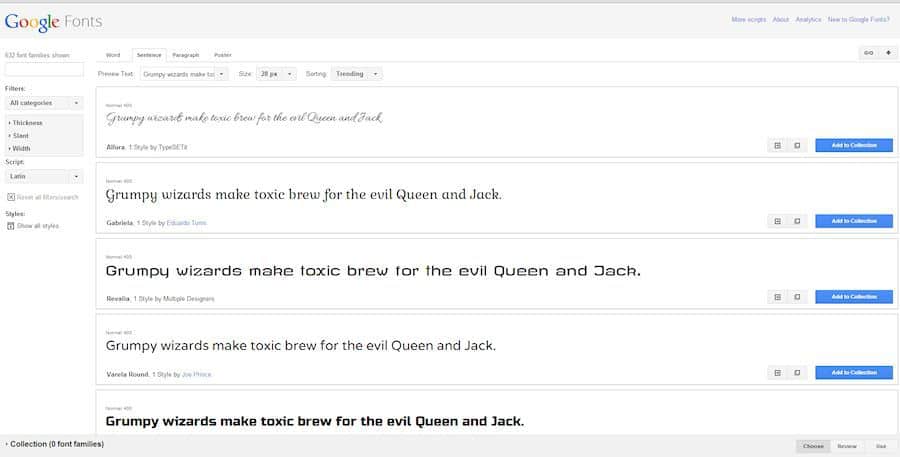
Installing a font on your Windows computer is extremely easy. For this example I will show you how to do it using Google Fonts.
Note: Click on the links to see image depicting what is being explained.
- Go to Google Fonts and find a font that you like. (Opens in a new window)
- Click on the “Add to Collection” button .
- Now click on the “Quick Use” icon.
- Click on the button with the arrow pointing downward.
- At this point a pop-up window should appear with several options. Use this to download your chosen font and save it to your computer. – – See where to find the download link.
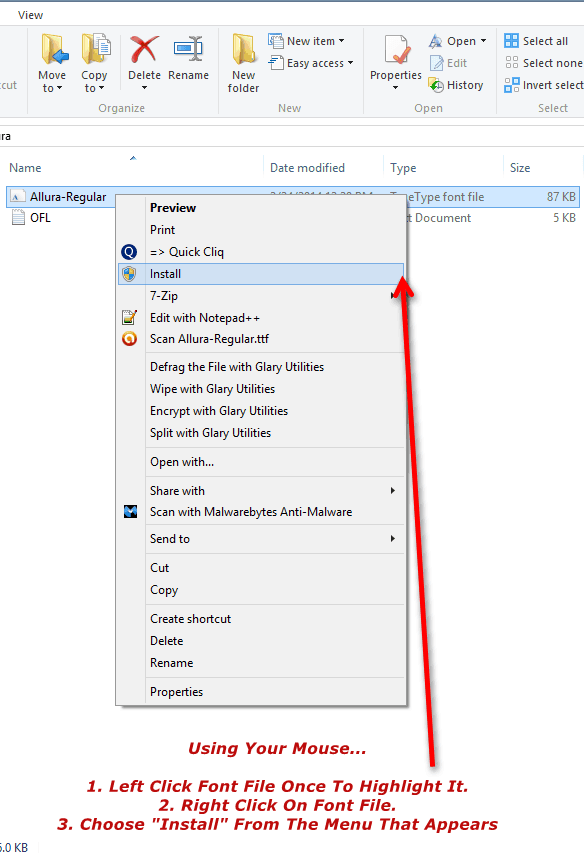
- If necessary, unzip the file you have downloaded and view the files inside.
- Using your mouse, first left click on the font file one time to highlight it. Now, right click on the font file and choose “Install”. (See illustration)
- You’re done. That’s all there is to it! The font you just installed should automatically appear in the font selections of any program (e.g. graphics editor), that you use from now on.
Would you like to receive notifications when more tips are posted?
– Please be sure to subscribe by adding your email to the subscription form at the bottom of each page.
– Also make sure to share this link with your friends and family using the share buttons provided below.